Last Updated on May 25, 2024 by Arnav Sharma
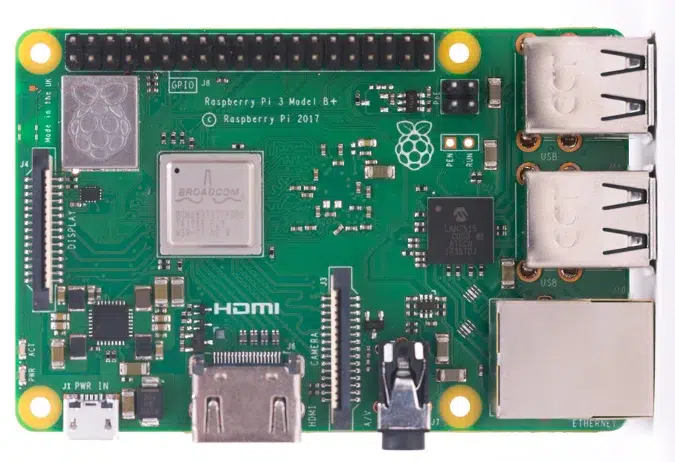
Raspberry Pi, a small and affordable computer running on Raspberry Pi OS, offers a versatile platform for various projects, including acting as a firewall for securing your network. By using a Raspberry Pi as a firewall with Raspberry Pi OS, you can control and protect network traffic, add an extra layer of security, and gain insight into your secure network activity. This guide will focus on configuring a Raspberry Pi firewall using OpenWRT, a popular open-source firmware for routers.
A firewall is an essential component of any network security strategy, providing a critical layer of defense against unauthorized access and cyber threats. Whether you’re a beginner or an experienced tech enthusiast, setting up a firewall can greatly enhance the security of your home network. In this comprehensive guide, we’ll explore how to use a Raspberry Pi as a firewall, detailing the configuration process, required hardware, and essential firewall settings.
Why Use a Raspberry Pi?
The Raspberry Pi is a small, affordable computer running on Linux-based Raspberry Pi OS that offers a versatile platform for various projects, including acting as a firewall. By using a Raspberry Pi as a firewall, you can control and protect network traffic, add an extra layer of security, and gain insight into your network activity. This guide will focus on configuring a Raspberry Pi firewall using OpenWRT, a popular open-source firmware for routers.
Step-by-Step Guide to Configuring Your Raspberry Pi Firewall
Step 1: Prepare Your Hardware
To get started, you’ll need the following hardware:
- Raspberry Pi (preferably Raspberry Pi 4 or Raspberry Pi 5)
- MicroSD card (at least 8GB)
- Ethernet adapter
- Power supply
- Computer for initial setup
Step 2: Download OpenWRT Firmware
Visit the official OpenWRT website and download the appropriate firmware for your Raspberry Pi model. Ensure you select the correct version to avoid compatibility issues.
Step 3: Flash the Firmware
Use a tool like Balena Etcher to flash the OpenWRT firmware onto your MicroSD card. This will install the necessary operating system and prepare your Raspberry Pi for configuration.
Step 4: Insert the MicroSD Card and Boot Your Raspberry Pi
Insert the flashed MicroSD card into your Raspberry Pi and connect it to your network via an Ethernet cable. Power up your Raspberry Pi and allow it to boot.
Step 5: Access OpenWRT Interface (SSH)
Connect your computer to the same network as your Raspberry Pi and open a web browser. Enter the default IP address (usually 192.168.1.1) to access the OpenWRT web interface. The default username is root, and the default password is admin.
Step 6: Change the Default Password
For security purposes, immediately change the default password to something more secure. This step is crucial to prevent unauthorized access.
Step 7: Configure Network Interfaces
Navigate to the network settings section and configure the LAN and WAN interfaces according to your network setup. Ensure that the Ethernet adapter is properly assigned to the WAN interface.
Step 8: Set Up Firewall Rules
Under the firewall settings, define the rules that will control the traffic flow between your network interfaces. Common rules include blocking incoming connections on port 80 and allowing SSH access for remote management.
Step 9: Enable Intrusion Detection
OpenWRT supports various intrusion detection systems (IDS) that can help identify and prevent unauthorized access. Configure the IDS settings to monitor network traffic and alert you to any suspicious activity.
Step 10: Test Your Configuration
Once all settings are configured, test your Raspberry Pi firewall to ensure it’s functioning correctly. Verify that the firewall rules are enforced and that your network is secure.
Configuring the Firewall
Configuring the firewall on your Raspberry Pi involves setting up rules to control the flow of network traffic. Here’s how to do it:
Basic Firewall Configuration
- Login to OpenWRT: Access the OpenWRT interface using the default IP address (
192.168.1.1). Login with the usernamerootand the password you set earlier. - Navigate to Firewall Settings: Go to the “Network” menu and select “Firewall.”
- Create Firewall Rules: Under the “Traffic Rules” tab, you can define new rules for incoming and outgoing traffic. For example, you can block all incoming traffic on port 80 (HTTP) and allow SSH access.
- Save and Apply: After configuring your rules, save and apply the settings. The firewall will start enforcing these rules immediately.
Advanced Firewall Configuration with iptables
For advanced users, iptables offers more granular control over firewall rules:
- Access via SSH: Use SSH to access your Raspberry Pi’s command line. From a terminal on your computer, run:
ssh [email protected]. - View Current Rules: To view current iptables rules, use:
iptables -L. - Add New Rules: To add a new rule, use a command like:
iptables -A INPUT -p tcp --dport 22 -j ACCEPT(this allows SSH access). - Save Changes: To save your iptables rules, use:
iptables-save > /etc/iptables.rules.
Enabling the Firewall for Home Network
To effectively use your Raspberry Pi firewall for a home network, follow these steps:
Step 1: Network Layout
Ensure your network layout is suitable for using a Raspberry Pi as a firewall. Typically, your Raspberry Pi will sit between your modem and router:
- Modem: Connects to your ISP and provides internet access.
- Raspberry Pi: Connects to the modem and acts as the firewall.
- Router: Connects to the Raspberry Pi and distributes internet to all devices on your local network.
Step 2: Connect the Raspberry Pi
- Modem to Raspberry Pi: Connect an Ethernet cable from the modem to the Raspberry Pi’s Ethernet port (WAN interface).
- Raspberry Pi to Router: Connect another Ethernet cable from the Raspberry Pi’s second Ethernet adapter to the router’s WAN port.
Step 3: Configure Network Settings
- Assign IP Addresses: Ensure the Raspberry Pi has a static IP address for both WAN and LAN interfaces. This can usually be configured in the OpenWRT interface under “Network” -> “Interfaces.”
- DNS Settings: Set up DNS settings to ensure proper internet connectivity. This can be configured under “Network” -> “DHCP and DNS.”
Step 4: Secure the Network
- Change Default Credentials: Always change default usernames and passwords to prevent unauthorized access.
- Regular Updates: Keep your Raspberry Pi’s firmware and software up to date to protect against vulnerabilities.
- Monitor Traffic: Regularly monitor network traffic and firewall logs for any suspicious activity.
Firewall for a Windows PC
To use your Raspberry Pi as a firewall for a Windows PC, you need to ensure that all traffic from your PC is routed through the Raspberry Pi. This setup effectively places the Raspberry Pi between your Windows PC and the internet, allowing it to control and filter traffic as a firewall. Here’s how to configure your network so that your Windows PC uses the Raspberry Pi as a firewall:
Network Setup
- Modem: Connects to your ISP and provides internet access.
- Raspberry Pi (Firewall): Connects to the modem and acts as the firewall.
- Router: Connects to the Raspberry Pi and distributes internet to all devices, including your Windows PC.
Physical Connections
- Modem to Raspberry Pi: Connect an Ethernet cable from the modem to the Raspberry Pi’s Ethernet port (WAN interface).
- Raspberry Pi to Router: Connect another Ethernet cable from the Raspberry Pi’s LAN port to the router’s WAN port.
- Router to Windows PC: Connect your Windows PC to the router via Ethernet or Wi-Fi.
Configuring the Raspberry Pi Firewall
Follow the steps from the previous sections to set up and configure OpenWRT on your Raspberry Pi. Ensure that the Raspberry Pi is properly configured to handle network traffic and enforce firewall rules.
Configuring Your Windows PC to Use the Raspberry Pi Firewall
- Check Router Configuration: Ensure that your router is set to obtain its IP address dynamically from the Raspberry Pi. This is usually the default setting.
- Set Default Gateway:
- On your Windows PC, open the Network and Sharing Center.
- Click on “Change adapter settings.”
- Right-click your active network connection and select “Properties.”
- Select “Internet Protocol Version 4 (TCP/IPv4)” and click “Properties.”
- Ensure “Obtain an IP address automatically” and “Obtain DNS server address automatically” are selected. This allows your PC to get network settings from the router, which in turn gets them from the Raspberry Pi.
- Verify Connection:
- Open a command prompt and type
ipconfig /all. - Ensure that the default gateway is the IP address of your router, which should be assigned by the Raspberry Pi.
- Ping an external website (e.g.,
ping google.com) to verify that your PC has internet access through the Raspberry Pi.
- Open a command prompt and type
Advanced Configuration (Optional)
For more advanced network setups or if you need to troubleshoot, you can manually configure network settings:
- Static IP Configuration:
- Assign a static IP address to your Windows PC that matches your network’s IP scheme.
- Set the default gateway to the IP address of the Raspberry Pi (usually
192.168.1.1). - Set the DNS server to the IP address of the Raspberry Pi or another reliable DNS server.
- Custom Firewall Rules:
- Define specific firewall rules on the Raspberry Pi to control traffic to and from your Windows PC.
- Use the OpenWRT web interface or
iptablescommands to set these rules.
Using the Raspberry Pi as a VPN Gateway
For added security, you can configure your Raspberry Pi to act as a VPN gateway. This encrypts traffic between your Windows PC and the internet:
- Install VPN Software: Set up OpenVPN or WireGuard on your Raspberry Pi.
- Configure VPN: Follow the VPN provider’s instructions to configure the VPN on your Raspberry Pi.
- Set Windows PC to Use VPN: Ensure that the Windows PC routes all traffic through the Raspberry Pi, which will forward it through the VPN tunnel.
FAQ:
Q: What are some useful features of a router for network security?
A: A router can provide several firewall features that control and protection for your network, reducing the risk of unauthorized access to your devices and network resources.
Q: What is a common Linux firewall tool?
A: One common Linux firewall tool is ufw, which stands for Uncomplicated Firewall.
Q: How can you connect your Raspberry Pi remotely?
A: You can connect your Raspberry Pi remotely using ssh, which allows for secure remote access to the device.
Q: What operating system is commonly used for Raspberry Pi?
A: Raspberry Pi OS, also known as raspi, is the official operating system commonly used for Raspberry Pis.
Q: What can a firewall provide in terms of network security?
A: A firewall can provide control and protection by filtering network traffic based on predefined security rules, reducing the risk of unauthorized access.
Q: How do you implement a firewall on Raspberry Pi OS?
A: Raspberry Pi OS comes with iptables, and you can implement a firewall using this built-in firewall feature to enhance your network security.
Q: Where can you find step-by-step instructions for Raspberry Pi projects?
A: You can find step-by-step instructions for Raspberry Pi projects on websites like Instructables and the official Raspberry Pi website.
Q: What is one way to enhance wireless network security with a Raspberry Pi?
A: You can enhance wireless network security by configuring a firewall on your Raspberry Pi and connecting it to a wireless router to monitor and control network traffic.