Last Updated on May 22, 2024 by Arnav Sharma
GitHub Actions is a powerful tool integrated with GitHub, allowing developers to automate their workflows directly within their GitHub repositories. This automation tool facilitates continuous integration (CI) and continuous delivery (CD), enabling seamless building, testing, and deployment of code. In this comprehensive tutorial, we’ll explore the basics of GitHub Actions, step-by-step instructions for creating workflows, when enhanced with GitHub actions, become powerful tools used to automate and streamline development tasks. and advanced use cases to enhance your development process.
A workflow in GitHub Actions is a set of automated steps defined in a YAML file located in your repository. This file outlines a series of jobs and steps that GitHub Actions will execute when triggered by specific events. Understanding how to create and manage workflows is crucial for maximizing the efficiency of your CI/CD pipeline.
GitHub Actions Tutorial
This GitHub Actions tutorial covers:
- Setting up your first workflow
- Using GitHub Actions for CI/CD
- Deployment strategies
- Real-world examples and use cases
- Integration with Kubernetes
Getting Started with GitHub Actions
To get started with GitHub Actions, follow these steps:
- Create a new repository: Navigate to the GitHub main page, click on the “+” icon, and select “New repository.” Name your repository and initialize it with a README file.
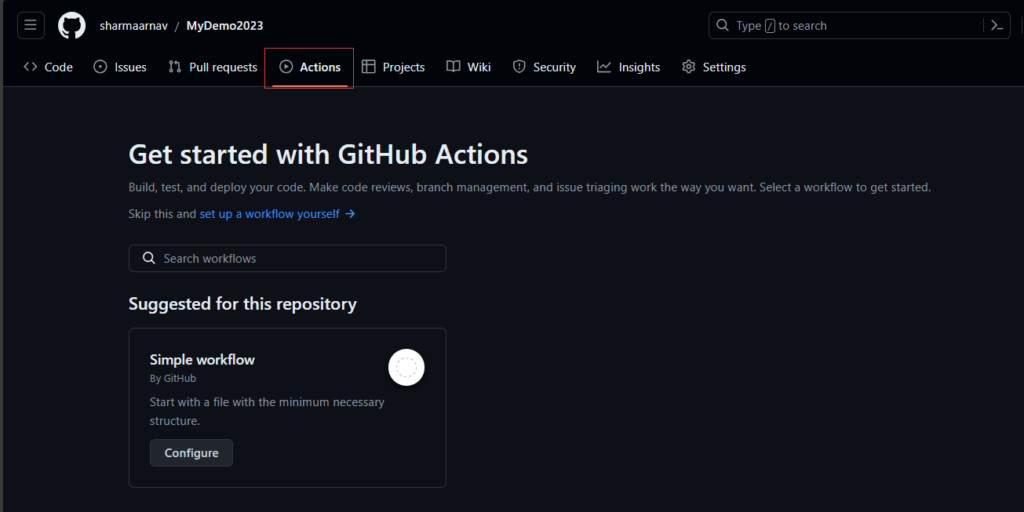
- Add a workflow file: Go to the “Actions” tab in your repository. GitHub provides several starter workflows. Choose a template that fits your needs or create a new workflow from scratch.
4. Define your workflow: Workflows are defined in a YAML file. Here’s a simple example:
name: CI
on: [push, pull_request]
jobs:
  build:
    runs-on: ubuntu-latest
    steps:
      - name: Checkout code
        uses: actions/checkout@v2
      - name: Set up Node.js
        uses: actions/setup-node@v2
        with:
          node-version: '14'
      - name: Install dependencies
        run: npm install
      - name: Run tests
        run: npm test
4. Commit the workflow file: Save and commit the YAML file to your repository. This will trigger the workflow based on the specified events, such as push or pull request.
Using GitHub Actions
Using GitHub Actions, you can automate various development tasks. Some common use cases include:
- Continuous Integration (CI): Automatically build and test your code when changes are pushed to the repository.
- Continuous Deployment (CD): Deploy your application to production or staging environments.
- Dependency Management: Automate the process of updating and installing dependencies.
- Containerization: Build and publish Docker images.
- Static Code Analysis: Run linters and static analysis tools to maintain code quality.
GitHub Actions Workflow
A GitHub Actions workflow consists of several components:
- Events: Triggers that initiate the workflow, such as a push or pull request.
- Jobs: A series of steps executed on a specified runner environment (e.g., Ubuntu, Windows).
- Steps: Individual tasks within a job, including checking out code, running scripts, and installing dependencies.
Creating Your First Actions
Creating your first GitHub Actions workflow is straightforward. Follow these steps to set up a basic CI workflow:
- Create a new repository: Start by creating a new repository on GitHub and initializing it with a README file.
- Navigate to the Actions tab: In your repository, go to the “Actions” tab to view available workflow templates.
- Select a workflow template: Choose a starter workflow that suits your project, or create a new workflow file.
- Edit the workflow file: Customize the YAML file according to your project’s requirements.
- Commit the file: Commit the workflow file to your repository to trigger the CI/CD pipeline.
Pipeline & Deployment Workflow
A CI/CD pipeline in GitHub Actions automates the processes of building, testing, and deploying code. By defining a pipeline in a YAML file, you can ensure consistent and repeatable processes throughout your software development lifecycle, leveraging tools like Jenkins for more complex orchestration.
Deployment workflows are crucial for automating the release of your application. With GitHub Actions, you can deploy to various environments, including cloud services and Kubernetes clusters. Here’s an example of a deployment workflow to AWS:
name: Deploy to AWS
on: [push]
jobs:
  deploy:
    runs-on: ubuntu-latest
    steps:
      - name: Checkout code
        uses: actions/checkout@v2
      - name: Configure AWS credentials
        uses: aws-actions/configure-aws-credentials@v1
        with:
          aws-access-key-id: ${{ secrets.AWS_ACCESS_KEY_ID }}
          aws-secret-access-key: ${{ secrets.AWS_SECRET_ACCESS_KEY }}
          aws-region: us-east-1
      - name: Deploy to S3
        run: |
          aws s3 sync . s3://my-bucket --exclude ".git/*"
Use Cases
GitHub Actions supports a wide range of use cases, from simple CI pipelines to complex deployment workflows. Some examples include:
- Building and testing Python projects: Use actions to set up Python environments, install dependencies, and run tests.
- Deploying to Kubernetes: Automate the deployment of your Docker containers to Kubernetes clusters.
- Continuous Delivery: Set up workflows to automatically deploy new versions of your application to production environments.
- Static Code Analysis: Run tools like ESLint or Flake8 to ensure code quality and consistency.
Example: Terraform Deployment to Azure using GitHub Actions
Prerequisites
- Azure Account: Ensure you have an Azure account and subscription.
- Terraform Configuration: Have your Terraform
.tffiles ready in your GitHub repository. - Azure Service Principal: Create an Azure service principal and obtain the following credentials:
AZURE_CLIENT_IDAZURE_CLIENT_SECRETAZURE_SUBSCRIPTION_IDAZURE_TENANT_ID
Step 1: Store Azure Credentials in GitHub Secrets
- Navigate to your GitHub repository.
- Go to Settings > Secrets and variables > Actions.
- Add the following secrets with their respective values:
AZURE_CLIENT_IDAZURE_CLIENT_SECRETAZURE_SUBSCRIPTION_IDAZURE_TENANT_ID
Step 2: Create a GitHub Actions Workflow
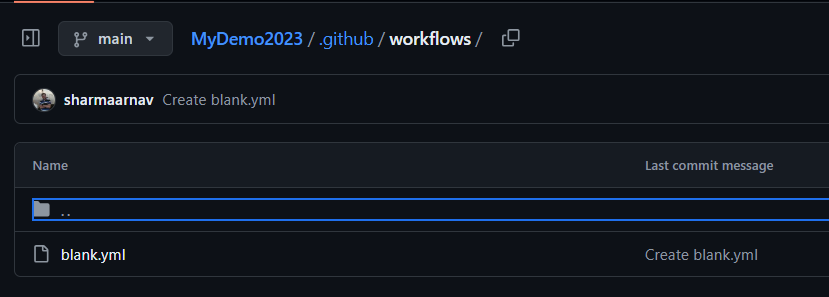
Create a .github/workflows/terraform-azure.yml file in your repository with the following content:
name: Terraform Deployment to Azure

on:
  push:
    branches:
      - main
  pull_request:
    branches:
      - main

jobs:
  terraform:
    runs-on: ubuntu-latest

    steps:
    - name: Checkout code
      uses: actions/checkout@v2

    - name: Setup Terraform
      uses: hashicorp/setup-terraform@v1
      with:
        terraform_version: 1.0.0

    - name: Login to Azure
      uses: azure/login@v1
      with:
        creds: ${{ secrets.AZURE_CREDENTIALS }}

    - name: Terraform Init
      run: terraform init

    - name: Terraform Plan
      run: terraform plan

    - name: Terraform Apply
      if: github.ref == 'refs/heads/main'
      run: terraform apply -auto-approve
Step 3: Adjust Your Workflow File
- Replace
terraform_version: 1.0.0with the version of Terraform you are using. - Ensure the
terraform init,terraform plan, andterraform applycommands point to the correct directory if your Terraform files are not in the root directory.
Example Terraform Configuration
Here’s a simple example of a Terraform configuration that deploys an Azure resource group:
# main.tf

provider "azurerm" {
  features {}
}

resource "azurerm_resource_group" "example" {
  name     = "example-resources"
  location = "East US"
}

output "resource_group_name" {
  value = azurerm_resource_group.example.name
}
Explanation of the Workflow
- Checkout code: This step checks out your repository to the runner.
- Setup Terraform: This uses the
hashicorp/setup-terraformaction to install the specified version of Terraform. - Login to Azure: This uses the
azure/loginaction to authenticate with Azure using the service principal credentials stored in GitHub secrets. - Terraform Init: Initializes the Terraform working directory.
- Terraform Plan: Generates and shows an execution plan.
- Terraform Apply: Applies the changes required to reach the desired state of the configuration. This step only runs on pushes to the
mainbranch.
GitHub Actions is a versatile tool that significantly enhances the automation of your development workflows. From setting up simple CI pipelines to managing complex deployment strategies, GitHub Actions provides the flexibility and power needed to streamline your development process. By following this tutorial, you should now have a solid foundation to start using GitHub Actions effectively. Explore the GitHub Marketplace for additional actions, tools, and join the GitHub community to share your workflows, learn from others, and find GitHub actions examples. Happy automating!
FAQ:
Q: How can I use GitHub Actions for continuous integration?
A: GitHub Actions can be used for continuous integration by setting up workflows that run tests automatically whenever code is pushed or a pull request is opened. You can define these workflows in a yaml file and configure them to trigger on various github events like pushes and pull requests.
Q: What are the main features of github actions?
A: The main features of github actions include the ability to create custom workflows, automate processes, and integrate with other devops tools. You can create your own actions, use pre-built actions from the github marketplace, and define workflows using a yaml file. They help in accelerating development and deployment processes.
Q: How do I create a workflow with GitHub Actions?
A: To create a workflow, you need to create a yaml file in your repository’s .github/workflows directory. This file will define one or more jobs that will run on specified github events like when using GitHub Actions to build and deploy applications automatically upon event triggers in the repo. code is pushed or a pull request is opened. You can specify different steps within each job to execute scripts, build applications, or deploy to environments like kubernetes.
Q: How does GitHub Actions support node.js applications?
A: GitHub Actions supports node.js applications by allowing you to create workflows that can build and push your node.js code. You can also publish node.js packages to a registry as part of your CI/CD pipeline. Using npm, you can automate testing and deployment processes.
Q: What is the process to build and push applications using GitHub Actions?
A: To build and push applications using GitHub Actions, you define a yaml file in your repository. This file specifies the steps to build your application, run tests, and push the built artifacts to a registry or deployment environment. These workflows can be triggered by various github events like a code push or pull request.
Q: How do I integrate GitHub Actions into my application developmentworkflow?
A: Integrate GitHub Actions into your application development workflow by creating workflows that automate testing, building, and deployment tasks. Define these workflows in yaml files and configure them to trigger on events such as code pushes or pull requests. This ensures that your devops processes are accelerated and automated.
Q: How can I get started with kubernetes using GitHub Actions?
A: You can integrate kubernetes as part of your continuous integration workflow. Use github actions to accelerateyour devops processes by defining a yaml file. This will help automate deployment to a kubernetes cluster when code is pushed to a github repository.
Q: How do I set up my first github action?
A: To set up your first github action, start by creating a github account if you don’t already have one. Follow a complete github actions tutorial to learn how to create a yaml file to define your workflow. This tutorial will guide shows you through creating one or more jobs and using npm or other tools in your workflow.
Q: Where can I find the github action docs?
A: The github docs are available on the github website. These docs guide you on how to configure and use github actions to accelerate your application development. They cover how to create custom actions, set up continuous integration and continuous delivery pipelines, and automated process made easy with GitHub Actions.
workflow run syntax